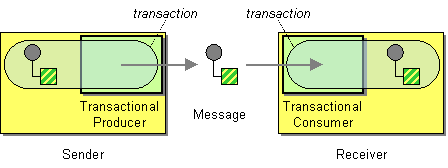
Transactional Client
Camel supports the Transactional Client from the EIP patterns using JTA transactions.
How can a client control its transactions with the messaging system?
Use a Transactional Client—make the client’s session with the messaging system transactional so that the client can specify transaction boundaries.
Transactions are supported by Spring Transactions and also with a JTA Transaction Manager.
Traditionally, a JTA Transaction Manager is included in JEE application servers. However, when running microservice applications with Spring Boot, or Quarkus, then a third-party JTA transaction manager can be embedded and used.
In Camel transactions are supported by JMS messaging components:
-
JMS (any JMS broker such as ActiveMQ Artemis)
And the SQL database components, such as:
Understanding Transactions
A transaction is a series of events. The start of a transaction is often named begin, and the end is commit (or rollback if the transaction isn’t successfully completed).
If you were to write in Java a locally managed transaction, then it could be something like:
TransactionManager tm = ...
Transaction tx = tm.getTransaction();
try {
    tx.begin();
    // code here under transaction
    tx.commit();
} catch (Exception e) {
    tx.rollback();
}
You start the transaction using the begin method. Then you have a series of events to do whatever work needs to be done. At the end, you either commit or rollback the transaction, depending on whether an exception is thrown.
You may already be familiar with this principle, and transactions in Camel use the same principle at a higher level of abstraction. In Camel transactions, you don’t invoke begin and commit methods from Java code; you use declarative transactions, which can be configured using Java code or in XML files. Camel doesn’t reinvent the wheel and implement a transaction manager, which is a complicated piece of technology to build. Instead, Camel uses APIs from either camel-spring or camel-jta.
Local vs Global Transactions
When talking about transactions, you need to distinguish between single- and multiple-resource transactions. The former are also known as local transactions, and the latter as global transactions
Local Transactions
If you only have a single resource (such as one database, or one messaging system), then transactions can be simpler to orchestrate by the transaction manager. This is known as local transactions.
When using local transactions with Spring Transactions, then you can use the dedicated transaction manager for the resource type such as:
-
org.springframework.jdbc.datasource.DataSourceTransactionManager -
org.springframework.jms.connection.JmsTransactionManager
| Consult the Spring documentation for more local transaction managers. |
Global Transactions
The situation changes when you need to span multiple resources in the same transaction, such as JMS and JDBC resources together.
To support multiple resources, you need to use a JTA (XA) capable transaction manager, which means using org.springframework.transaction.jta.JtaTransactionManager with Spring Transactions.
| For more information on JTA, see the Wikipedia page on the subject. here: XA is also briefly discussed. |
That is not all, you also need to use a JTA transaction implementation such as:
And all of this must be configured correctly to have JTA transaction working. You may also need to do special configuration from the vendors of the resources (i.e., database or messaging system) to have this work properly with JTA/XA transactions. Consult the documentation of those systems for more details.
About Spring Transactions
Camel uses Spring Transaction APIs (camel-spring) to manage transactions via its TransactionManager API. Depending on the kinds of resources that are taking part in the transaction, an appropriate implementation of the transaction manager must be chosen. Spring offers a number of transaction managers out of the box that work for various local transactions such as JMS and JDBC. But for global transactions, you must use a third-party JTA transaction manager implementation; JTA transaction manager is provided by Java EE application servers. Spring doesn’t offer that out of the box, only the necessary API abstract that Camel uses.
Using Transactions in Camel
In Camel, transactions are used by:
-
Setting up transaction manager via either Spring Transactions or JTA Transactions.
-
Marking routes as transacted
-
Using different transaction propagations for rare use-cases
You will later in the two transactional examples further below, see how to set up transaction manager in Camel.
Marking a route as transacted
When using transactions (JTA or Spring Transaction) in Camel then you enable this on routes by using transacted right after from in the routes.
For example, that would be:
-
Java
-
XML
-
YAML
from("jms:cheese")
    .transacted()
    .to("bean:foo");
<route>
<from uri="jms:cheese"/>
<transacted/>
<to uri="bean:foo"/>
</route>- route:
from:
uri: jms:cheese
steps:
- transacted: {}
- to:
uri: bean:fooWhen you specify <transacted/> in a route, Camel uses transactions for that particular route and any other routes that the message may undertake.
When a route is specified as <transacted/>, then under the hood Camel looks up the Spring/JTA transaction manager and uses it. This is a convention over configuration.
The convention over configuration applies only when you have a single Spring/JTA transaction manager configured. In more complex scenarios, where you either use multiple transaction managers or transaction propagation policies, you have to do additional configuration.
Using different transaction propagations
In some rare situations, you may need to use multiple transactions with the same exchange.
For example, an exchange starts off using PROPAGATION_REQUIRED, and then you need to use another transaction that’s independent of the existing transaction. You can do this by using PROPAGATION_REQUIRES_NEW, which will start a new transaction.
| In Camel, a route can only have exactly one transaction policy, which means that if you need to change transaction propagation, then you must use a new route. |
When the exchange completes, the transaction manager will issue commits or rollbacks to these two transactions, which ensures that they both complete at the same time. Because two transaction legs are in play, they can have different outcomes; for example, transaction 1 can roll back, while transaction 2 commits, and vice versa.
In Camel, you need to configure the propagations using SpringTransactionPolicy as shown in the following Spring XML snippets:
-
Spring XML
<bean id="txRequired" class="org.apache.camel.spring.spi.SpringTransactionPolicy">
    <property name="transactionManager" ref="jmsTransactionManager"/>
</bean>

<bean id="txRequiresNew" class="org.apache.camel.spring.spi.SpringTransactionPolicy">
    <property name="transactionManager" ref="jmsTransactionManager"/>
    <property name="propagationBehaviorName" value="PROPAGATION_REQUIRES_NEW"/>
</bean>

<bean id="txMandatory" class="org.apache.camel.spring.spi.SpringTransactionPolicy">
    <property name="transactionManager" ref="jmsTransactionManager"/>
    <property name="propagationBehaviorName" value="PROPAGATION_REQUIRES_MANDATORY"/>
</bean>
Then we have routes where each of the routes uses their different policy:
-
Spring XML
-
YAML
<camelContext xmlns="http://camel.apache.org/schema/spring">
    <route>
        <from uri="activemq:queue:inbox"/>
        <transacted ref="txRequired"/>
        <to uri="direct:audit"/>
        <to uri="direct:order"/>
        <to uri="activemq:queue:order"/>
    </route>

    <route>
        <from uri="direct:audit"/>
        <transacted ref="txRequiresNew"/>
        <bean ref="auditLogService" method="insertAuditLog"/>
    </route>

    <route>
        <from uri="direct:order"/>
        <transacted ref="txMandatory"/>
        <bean ref="orderService" method="insertOrder"/>
    </route>
</camelContext>
- route:
from:
uri: activemq:queue:inbox
steps:
- transacted:
ref: txRequired
- to:
uri: direct:audit
- to:
uri: direct:order
- to:
uri: activemq:queue:order
- route:
from:
uri: direct:audit
steps:
- transacted:
ref: txRequiresNew
- bean:
ref: auditLogService
method: insertAuditLog
- route:
from:
uri: direct:order
steps:
- transacted:
ref: txMandatory
- bean:
ref: orderService
method: insertOrderNotice how the ref attribute on <transacted> refers to the corresponding bean id of the transaction policy.
| Keep it simple: Although you can use multiple propagation behaviors with multiple routes in Camel, do so with care. Try to design your solutions with as few propagations as possible, because complexity increases dramatically when you introduce new propagation behaviors |
Transaction example with a database
In this sample, we want to ensure that two endpoints are under transaction control. These two endpoints insert data into a database.
The sample is in its full as a unit test.
First, we set up the usual spring stuff in its configuration file. Here we have defined a DataSource to the HSQLDB and most importantly the Spring DataSourceTransactionManager that is doing the heavy lifting of ensuring our transactional policies.
As we use the new convention over configuration, we do not need to configure a transaction policy bean, so we do not have any PROPAGATION_REQUIRED beans. All the beans needed to be configured are standard Spring beans only, there is no Camel specific configuration at all.
-
Spring XML
<!-- this example uses JDBC so we define a data source -->
<jdbc:embedded-database id="dataSource" type="H2">
    <jdbc:script location="classpath:sql/init.sql" />
</jdbc:embedded-database>

<!-- spring transaction manager -->
<!-- this is the transaction manager Camel will use for transacted routes -->
<bean id="txManager" class="org.springframework.jdbc.datasource.DataSourceTransactionManager">
    <property name="dataSource" ref="dataSource"/>
</bean>

<!-- bean for book business logic -->
<bean id="bookService" class="org.apache.camel.spring.interceptor.BookService">
    <property name="dataSource" ref="dataSource"/>
</bean>
Then we are ready to define our Camel routes. We have two routes: 1 for success conditions, and 1 for a forced rollback condition.
This is, after all, based on a unit test. Notice that we mark each route as transacted using the <transacted/> XML tag.
-
Spring XML
-
YAML
<camelContext xmlns="http://camel.apache.org/schema/spring">

    <route>
        <from uri="direct:okay"/>
        <!-- we mark this route as transacted. Camel will look up the spring transaction manager
             and use it by default. We can optimally pass in arguments to specify a policy to use
             that is configured with a spring transaction manager of choice. However, Camel supports
             convention over configuration as we can just use the defaults out of the box and Camel
             that suites in most situations -->
        <transacted/>
        <setBody>
            <constant>Tiger in Action</constant>
        </setBody>
        <bean ref="bookService"/>
        <setBody>
            <constant>Elephant in Action</constant>
        </setBody>
        <bean ref="bookService"/>
    </route>

    <route>
        <from uri="direct:fail"/>
        <!-- we mark this route as transacted. See comments above. -->
        <transacted/>
        <setBody>
            <constant>Tiger in Action</constant>
        </setBody>
        <bean ref="bookService"/>
        <setBody>
            <constant>Donkey in Action</constant>
        </setBody>
        <bean ref="bookService"/>
    </route>

</camelContext>
- route:
from:
uri: direct:okay
steps:
- transacted: {}
- setBody:
expression:
constant:
expression: Tiger in Action
- bean:
ref: bookService
- setBody:
expression:
constant:
expression: Elephant in Action
- bean:
ref: bookService
- route:
from:
uri: direct:fail
steps:
- transacted: {}
- setBody:
expression:
constant:
expression: Tiger in Action
- bean:
ref: bookService
- setBody:
expression:
constant:
expression: Donkey in Action
- bean:
ref: bookServiceThat is all that is needed to configure a Camel route as being transacted. Remember to use <transacted/>. The rest is standard Spring XML to set up the transaction manager.
Transaction example with JMS
In this sample, we want to listen for messages in a queue and process the messages with our business logic java code and send them along. Since it is based on a unit test, the destination is a mock endpoint.
First, we configure the standard Spring XML to declare a JMS connection factory, a JMS transaction manager and our ActiveMQ component that we use in our routing.
-
Spring XML
<!-- setup JMS connection factory -->
<bean id="poolConnectionFactory" class="org.apache.activemq.pool.PooledConnectionFactory" init-method="start" destroy-method="stop">
<property name="maxConnections" value="8"/>
<property name="connectionFactory" ref="jmsConnectionFactory"/>
</bean>
<bean id="jmsConnectionFactory" class="org.apache.activemq.ActiveMQConnectionFactory">
<property name="brokerURL" value="vm://localhost?broker.persistent=false&broker.useJmx=false"/>
</bean>
<!-- setup spring jms TX manager -->
<bean id="jmsTransactionManager" class="org.springframework.jms.connection.JmsTransactionManager">
<property name="connectionFactory" ref="poolConnectionFactory"/>
</bean>
<!-- define our activemq component -->
<bean id="activemq" class="org.apache.activemq.camel.component.ActiveMQComponent">
<property name="connectionFactory" ref="poolConnectionFactory"/>
<!-- define the jms consumer/producer as transacted -->
<property name="transacted" value="true"/>
<!-- set up the transaction manager to use -->
<!-- if not provided, then Camel will automatically use a JmsTransactionManager, however, if you
for instance use a JTA transaction manager, then you must configure it -->
<property name="transactionManager" ref="jmsTransactionManager"/>
</bean>And then we configure our routes. Notice that all we have to do is mark the route as transacted using the <transacted/> XML tag.
-
Spring XML
-
YAML
<camelContext xmlns="http://camel.apache.org/schema/spring">
    <route>
        <!-- 1: from the jms queue -->
        <from uri="activemq:queue:okay"/>
        <!-- 2: mark this route as transacted -->
        <transacted/>
        <!-- 3: call our business logic that is myProcessor -->
        <process ref="myProcessor"/>
        <!-- 4: if success then send it to the mock -->
        <to uri="mock:result"/>
    </route>
</camelContext>
- route:
from:
uri: activemq:queue:okay
steps:
- transacted: {}
- process:
ref: myProcessor
- to:
uri: mock:result